
Baseball is not just a sport; it's a tradition that has been passed down through generations. The crack of the bat, the cheers of the crowd, and the joy of playing with friends make it a beloved pastime for many. One of the fundamental skills every young baseball player must learn is how to throw a baseball accurately and effectively. But how to teach a kid to throw a baseball correctly? It is not just about the mechanics; it's about instilling confidence, developing coordination, and nurturing a lifelong love for the game. In this guide, we'll walk you through the process of teaching a kid to throw a baseball step by step.
Step 1: Basic Grip and Stance

The basic grip is the most common way to hold a baseball. To use this grip, the young players need to place their index and middle fingers across the seams of the ball, and their thumb underneath. This grip allows them to control the direction and speed of the ball. They should avoid holding the ball too tightly or too loosely, as this can affect their accuracy and power.

The basic stance is the position that they adopt before they throw the ball. To use this stance, they need to stand with their feet shoulder-width apart, and their knees slightly bent. They should face the target with their glove-side shoulder, and hold the ball in their throwing hand behind their back. Make sure their non-throwing arm is extended towards the target for balance.
Step 2: Body Positioning

One of the most important aspects of teaching a kid to throw a baseball is body positioning. A good body position allows the kid to generate more power, accuracy, and control in their throw. Here are some tips on how to teach body positioning to a kid:
Start with the feet. The kid should stand with their feet shoulder-width apart and their toes pointing slightly outward. This will help them balance and rotate their hips during the throw.
Next, focus on the hips. The kid should turn their hips so that they are facing away from their target. This will create a separation between the upper and lower body, which is essential for generating torque and speed in the throw.
Then, move on to the shoulders. The kid should rotate their shoulders so that they are perpendicular to their target. Their throwing arm should be behind their head, forming an L-shape with their elbow. Their glove arm should be in front of their chest, pointing at their target.
Finally, teach the kid how to release the ball. The kid should snap their wrist and elbow forward as they bring their throwing arm across their body. They should follow through with their arm until it reaches the opposite hip. Their glove arm should tuck into their side as they finish the throw.
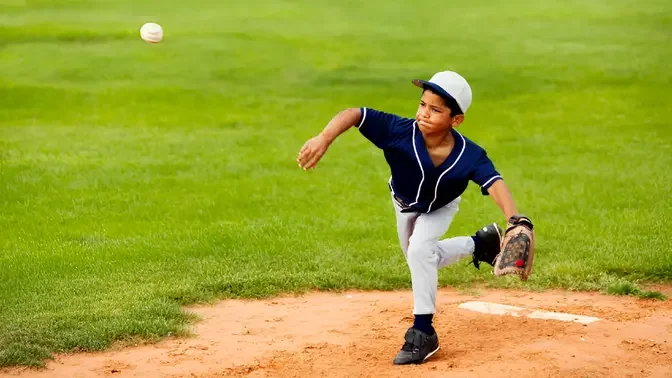
Step 3: Wind-Up and Throwing Motion
(Photo: iyca.org)
The wind-up is the preparatory phase of the throw, where the pitcher builds up momentum and aligns his body with the target. The wind-up consists of four steps:
1. The pitcher stands on the rubber (the raised part of the mound) with his feet shoulder-width apart and his toes pointing toward home plate. He holds the ball in his glove in front of his chest, with his throwing hand hidden inside.
2. The pitcher lifts his front leg (the one opposite his throwing arm) and brings it up to his chest, while simultaneously raising his arms above his head. He keeps his eyes on the target and his shoulders level.
3. The pitcher lowers his front leg and strides forward, landing on the ball of his foot. He also lowers his arms and separates his hands, bringing the ball behind his ear and pointing his glove toward home plate. He keeps his back leg bent and pushes off the rubber with his toes.
4. The pitcher rotates his hips and shoulders toward home plate while extending his throwing arm forward. He snaps his wrist and releases the ball with a flick of his fingers, aiming for the catcher's mitt. He follows through with his arm, bringing it across his body and toward his opposite hip.

The throwing motion is the actual delivery of the ball, where the pitcher transfers the energy from his wind-up to the ball. The throwing motion consists of three phases:
1. The cocking phase, where the pitcher brings the ball behind his ear and prepares to throw it. In this phase, he should keep his elbow at shoulder level or slightly above, and avoid dropping or raising it too much. He should also keep his wrist straight and avoid twisting or bending it.
2. The acceleration phase, where the pitcher propels the ball forward with his arm, wrist, and fingers. In this phase, he should accelerate the ball as fast as possible, while maintaining control and accuracy. He should also keep his elbow in line with his shoulder and avoid throwing across his body or opening up too soon.
3. The deceleration phase, where the pitcher slows down his arm after releasing the ball. In this phase, he should relax his arm and let it follow through naturally, without stopping or jerking it abruptly. He should also avoid pulling back or twisting his arm.
Step 4: Follow-Through

One of the most important aspects of teaching a kid to throw a baseball is the follow-through. The follow-through is the motion of the arm and body after the ball leaves the hand. It helps to maintain balance, accuracy, and power in the throw. Here are some tips on how to teach a kid to follow-through properly:
Explain the benefits of follow-through. Tell the kid that follow-through will help them throw faster, farther, and more accurately. It will also prevent injuries by reducing stress on the arm and shoulder.
Demonstrate the follow-through. Show the kid how to extend the arm fully after releasing the ball, and how to rotate the torso and hips in the direction of the throw. Point out how your elbow should end up near your opposite hip, and how your glove hand should swing across your body.
Practice the follow-through. Have the kid practice throwing with a focus on follow-through. Use verbal cues like "extend", "rotate", and "swing" to guide them. Give positive feedback when they do it correctly, and correct any mistakes gently.
Step 5: Practice and Repetition

Teaching a kid to throw a baseball is a fun and rewarding activity that can help them develop their motor skills, coordination, and confidence. However, it is not something that can be learned overnight. It requires practice and repetition to master the proper technique and avoid injuries. Here are some tips on how to teach a kid to throw a baseball effectively:
Use positive feedback and encouragement. Throwing a baseball can be frustrating for beginners, especially if they miss the target or feel pain in their arm. Be patient and supportive of their efforts, and praise them for what they do well. Avoid criticizing or scolding them for their mistakes, as this can lower their self-esteem and motivation. Instead, offer constructive suggestions on how to improve their technique and accuracy.
Make it fun and challenging. To keep the kid interested and engaged, you can turn the throwing practice into a game or a competition. For example, you can set up different targets at varying distances and award points for hitting them. You can also challenge them to throw faster, farther, or more accurately than you or another kid. However, make sure the game is appropriate for their age and skill level, and do not push them beyond their limits.
Repeat and reinforce. To develop muscle memory and consistency, the kid needs to practice throwing regularly and frequently. Ideally, you should practice with them at least three times a week, for about 15 to 20 minutes each session. You can also encourage them to practice on their own or with a friend, as long as they follow the proper safety precautions. As they progress, you can gradually increase the difficulty and complexity of the drills, such as changing the distance, angle, or speed of the throws.
Step 6: Video Analysis

One of the best ways to teach a kid how to throw a baseball is to use video analysis. Video analysis is a technique that allows you to record and review the kid's throwing motion, identify strengths and weaknesses, and provide feedback and corrections. Here are some steps to follow when using video analysis:
Choose a good camera and a tripod. You want to capture the kid's throwing motion from different angles, such as front, side, and back. A tripod will help you keep the camera steady and avoid blurry images.
Find a suitable location and time. You want to have enough space and light to record the kid's throwing motion. You also want to avoid distractions and interruptions, such as other people, traffic, or noise.
Record the kid's throwing motion. You can ask the kid to throw a few warm-up pitches, then record several throws at different speeds and distances. You can also record some throws from different positions, such as standing, kneeling, or lying down.
Review the video and analyze the throwing motion. You can use software or an app that allows you to slow down, pause, zoom in, or draw on the video. You can look for aspects such as grip, arm angle, shoulder rotation, elbow extension, wrist snap, release point, follow-through, and body balance.
Provide feedback and corrections. You can show the kid the video and point out what they are doing well and what they need to improve. You can also demonstrate the correct throwing motion or use drills and exercises to help them practice. You can use positive reinforcement and encouragement to motivate the kid and boost their confidence.
Repeat the process. You can record and review the kid's throwing motion again after they have practiced for a while. You can compare the videos and see if there is any improvement or change. You can also set goals and track progress over time.
Step 7: Seek Professional Coaching

A professional coach can assess the kid's current level of ability and tailor a training program that suits their needs and goals. They can also provide feedback, tips, and encouragement along the way, as well as correct any bad habits or mistakes that might hinder the kid's progress. A professional coach can also teach the kid how to throw different types of pitches, such as fastballs, curveballs, and changeups, depending on their age and interest.
Seeking professional coaching does not mean that the parent has to give up their role as a teacher or a supporter. On the contrary, the parent can still be involved in the kid's learning process by practicing with them at home, watching their games, and cheering them on. The parent can also communicate with the coach and ask for advice on how to help the kid improve further.
Teaching a kid to throw a baseball is not only about developing their physical skills but also their mental and emotional ones. It can help them learn valuable lessons such as teamwork, discipline, perseverance, and sportsmanship. It can also foster a lifelong love for the game and a healthy lifestyle. By seeking professional coaching, the parent can ensure that the kid gets the best possible guidance and support to achieve their full potential.
The Bottom Line
Remember, the journey of teaching a kid to throw a baseball is not just about molding them into great players; it's about fostering a lifelong love for the game, instilling important values like discipline and teamwork, and creating cherished memories that will last a lifetime. So, lace up those sneakers, grab a baseball, and embark on this exciting journey of teaching a young player to throw with precision and passion.
Watch more video: How to Teach a Kid to Throw a Baseball | Basic Throwing Mechanics | Baseball Drills