
Adding a touch of nature to your living space can bring tranquility and beauty to your surroundings. One way to achieve this is by creating a DIY container water garden. Container water gardens are not only aesthetically pleasing but also relatively easy to set up and maintain. In this article, we will guide you through the steps to create your own miniature aquatic area, right in the comfort of your home.
Materials Needed
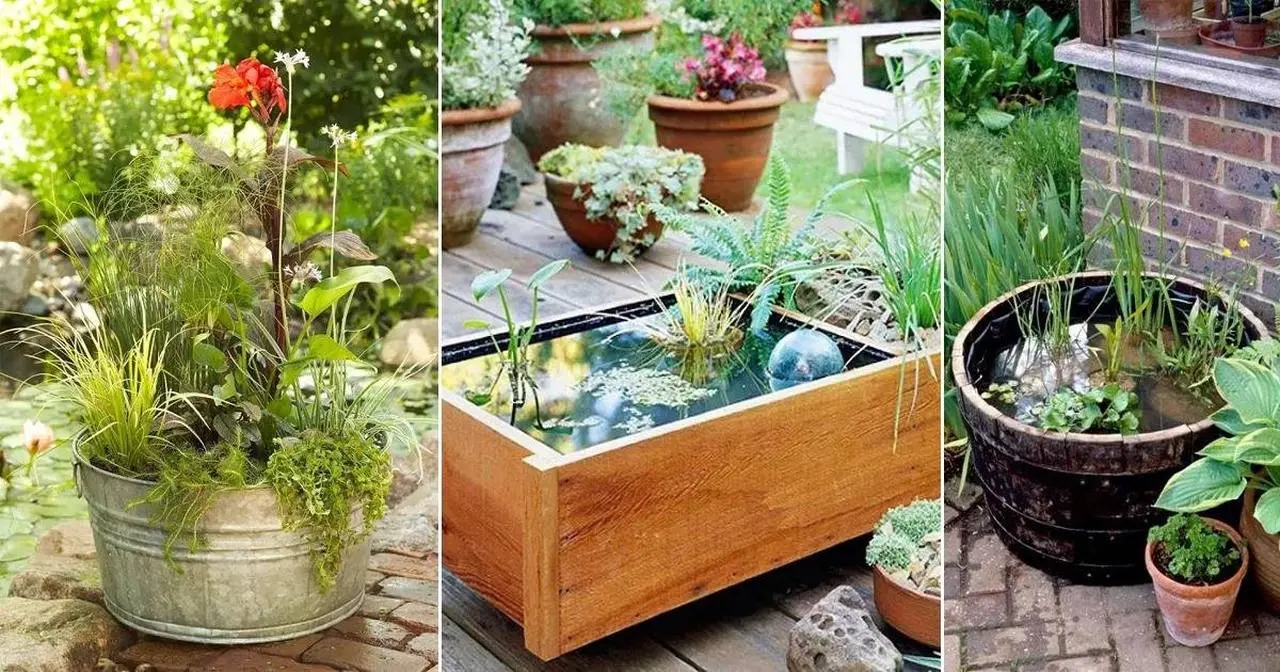
- Container: Choose a watertight container of your choice. This could be a ceramic pot, a wooden barrel, a galvanized tub, or even a repurposed bowl. The size of the container will depend on the available space and your design preferences.
- Water Plants: Select a variety of aquatic plants suitable for container gardening. Consider options like water lilies, lotus, water hyacinth, water lettuce, and water iris. These plants not only beautify your water garden but also help maintain water quality.
- Aquatic Soil: Choose a specialized aquatic soil mix or a loamy garden soil that won't leach nutrients into the water. This soil type provides a stable substrate for your plants to anchor their roots.
- Gravel: Use gravel or stones to cover the soil surface. This helps prevent soil from clouding the water and provides a natural appearance.
- Sand: Fine sand adds a natural aesthetic layer to your water garden.
- Water: The main element of your water garden. You can use tap water, but allowing it to sit for a day can help dechlorinate it.
Step-by-Step Guide
1. Choose a Suitable Container
Select a container that aligns with your design preferences and the available space. Make sure it is thoroughly cleaned and devoid of any contaminants.
2. Create a Gravel Foundation
Commence the process by placing a layer of gravel at the base of the container. This foundational step will pave the way for the following stages.
3. Add Aquatic Soil
Fill the container with aquatic soil, ensuring even distribution. Carefully pat down the soil to establish a sturdy foundation for your plants.
4. Plant Your Water Plants
Place your chosen aquatic plants in the soil, ensuring they are properly spaced. Arrange taller plants towards the center and shorter ones around the edges. Planting depth varies for different plants, so be sure to follow the instructions for each.

5. Apply a Layer of Fine Sand on Top
To prevent soil from clouding the water, gently spread a layer of fine sand over the soil surface. This not only helps maintain water clarity but also contributes to a natural and aesthetically pleasing appearance in your water garden.
6. Add Water
Carefully add water to your container. Use the sprayer and spray water to prevent the soil from crashing.

7. Plant Additional Flora
Consider adding water hyacinth or other suitable aquatic plants to enhance the greenery of your container water garden.

8. Incorporate Small Colorful Fish
Incorporating small colorful fish will infuse your container water garden with vitality, creating a lively and vibrant ambiance.

Making your own container water garden can be a fun and creative project. It brings the peaceful beauty of water plants into your living space. By following these steps, you can have a calm green area right at home. Whether you love gardening or you're just starting, this project is a special way to enjoy nature and add some tranquility to your surroundings.
The video below will guide you through the process of creating your DIY container water garden successfully. Happy gardening!
Leave a Comment